Monday, August 1, 2011

Nailheads, a mild obsession

I have a slight obsession with nailhead trim.  I think it’s an amazing design detail that adds a level of luxe and sophistication to furniture.  I am super excited to see the new trend of applying it to  furniture pieces such as console tables, benches and desks…it's not just for upholstery anymore!
Below are some of my favorite pieces and the inspiration for my DIY linen and nailhead trim Cabinet (see below).


Heart Norwegian Wood


Catlin Creer Interiors

Decor Pad
Design Manifest

Divine Distractions

Coco Cozy

Decor Pad

Decor Pad

Coco Cozy

Duneier Design

Horchow

Laura Burciaga

Libbie Grove Design

Lindsey Bond

The Lennox
Andrew Martin Furniture


Adeeni Design Group

Andrew Martin Furniture

This is the inspiration piece for my DIY project:

 
Its LINEN and Nailhead studs....LOVE IT!
It is from Bernhardt Furniture

Here is my BEFORE Cabinet.  Its a cheap-o cabinet I bought from IKEA a while back to use for extra storage:


And now for the the tutorial:

Materials
Piece of furniture of your choice

Fabric of choice (I chose a white linen)
Spray Mount
Wire Cutters
Scissors
Screw Driver
Hammer
Ruler
Pencil

Step 1
Take off all drawer and door hardware and remove the doors and drawers from the furniture piece.

Step 2
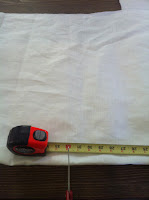
Decide what part of your furniture piece you want to cover in Fabric.  I chose to recover my entire cabinet.  Next cut the fabric to fit each component of the furniture piece.  I cut 5pieces total: 1 large piece (for the top and 2 sides), 2 pieces for the drawers and 2 more pieces for cabinet doors.  Cut each piece of fabric about 1” longer and wider to allow for wrapping the fabric and for error.


Step 3
In a WELL VENTALATED AREA apply spray mount to the top of the of your furniture piece or what ever area you choose to recover.  Allow 15 seconds for the spray mount to become tacky then apply your fabric using your hands to smooth the fabric getting out all the air bubbles. Repeat this process until all the parts of your furniture piece are covered in fabric.


Step 4
With your glue gun apply glue to the extra allowance of fabric.  Fold the fabric under to cover the raw edges and press into the back side of the furniture piece.  Do this for each piece of fabric.

Step 5
Scotchgaurd, scotchgaurd, scotchgarud!  Oh boy does this apply to me.  I have a 1 year old I dubbed the Tasmania Devil.  As cute as she is, she is into EVERYTHING and I want to be able to get clean whatever stains her cute, grubby hands get on my new, white linen cabinet!
Step 6
Decide on a design.  I chose a simple box design with a Hollywood regency feel to it.  I measured out 2” lines forming a box between the 2 drawers and 2 doors and marked each line with a pencil.  You could also do something similar to the inspiration piece with a stencil. 

Step 7
Apply the nailhead trim.  Using your pencil lines as a guide, apply the nailhead trim.  You have 2 options for trim.  You can use the individual nailheads or the continuous strip of nails.  I do think the individual nailheads provide a better look and they are especially good to use if your design includes any curves or circles.  However I chose to use continuous strips of nails because they help keep your lines straight and cut down on time!

AFTER- Linen and Nailhead Trim Cabinet


Good Luck!


Denise

Friday, July 15, 2011

Beaded Chandeliers

Beaded Chandeliers are popping up everywhere and I couldn't be happier.  They provide the perfect balance of warmth, style, and whimsy to a space... I can't seem to take my eyes off  of them.
Scroll down to see how you can make one of these stunning, designer chandeliers on a shoe string budget!
I ADORE this dining room and the chandelier....drool!
decorpad.com

decorpad.com

Arteriors Home
Decorpad


BHG Photography


Bella Mancini  Design
clayton gray home

currey and co

Decorpad

Decorpad

Decorpad

Decorpad


I can't get enough of the tuquorise chandelier!
Willey Design

LOVE IT!!
Laura Stern Design


AHHHH!
decorpad

decorpad


decorpad

Now for the part you've all been waiting for...The Beaded Chandelier DIY Project:


This is the inspiration Chandelier by Majorie Skouras...Don't you just LOVE it??!


Here is the Tutorial...Thanks Dollar Store Crafts!


Project Materials:
  • Hanging wire basket, $1
  • 6 packages of Mardi Gras-style metallic beads (about 48 necklaces), $6
  • Light gauge wire (floral wire will work), $1
  • Spray paint, $1
  • Wire cutters, on hand or $1
  • Hot glue gun & sticks, on hand
  • Additional embellishments, as desired
Total: $9 and up


To Make:

To prepare the beads: paint with white spray paint. Allow to dry, and add another coat of paint if necessary. You will be able to touch them up after the whole project is assembled.
Prepare the wire basket: spray paint the wire basket and chains. Again, you'll be able to touch up the whole thing again after everything is assembled.
Production note: I didn't spray paint before I assembled, but I think it's a good idea to do so. You won't be able to get the beads uniformly painted if you don't paint before you assemble.
Work area: I hung the basket above my work surface so I could work on it while it was hanging like it would be when displayed. If you can finagle a way to do this, I recommend it.


Wire: cut many pieces of light gauge wire at a length of about 2" or so. You'll need a couple hundred, but you can just cut 10 or so at a time, as needed.


Beads: Find the spot where the two beads are fused together and break them apart. You can just pop them apart with your fingers.


Attaching the bead necklaces together: As you wire your chandelier, you will hot glue one end of the necklace to the end of the next necklace. I recommend doing this as you go to keep everything nice and neat (and untangled). Remember to be careful when handling the hot glue!


Wiring the bottom of the chandelier:
Take your first necklace, and a piece of wire. Wrap the wire securely around the thread between the first two beads and twist around once or twice to make sure the wire won't come apart from the necklace. Then wire the necklace to the top of the wire basket form. Wrap the wire around the basket securely, and twist at least twice to make sure it's secure. Leave the end of the wire long for now.

Hold the necklace up to the bottom of the basket to see where you'll need to add the next wire. At that spot on the necklace, add the wire as instructed above, and wire to the lower frame of the wire basket.

Continue until you reach the end of the necklace, and hot glue the next necklace to the end and continue. Continue this process until the bottom of the basket is filled with beading. I wired about four sections of beads to each segment of the wire basket, and used two packages of beads to cover the whole wire basket.

At this point, you can trim the wires in the bottom hole of the basket. Make sure each one is twisted securely, then clip near the twisted area to make it look neater. Leave the tails on the top part of the basket - you will use them in the next section of the project.

Wiring the top of the chandelier:
Production notes: Again, it is easiest if your basket is hanging while you are assembling. It takes about twice as many necklaces to bead the top of the chandelier.
Start with a new necklace (or hot glue a new necklace to any extra beading left at the end of the bottom section), and wire it to an existing wire. Pull it up to the top of the hanging basket, where the chains meet. Take a longer piece of wire (about 4 to 6" long), and wire the beads to the top link in one of the chains. Pull the bead back down to the basket and wire to an existing section of beading (using the tails that you left in the first part of the project).

Bring the beads back up to the top and wire to the long piece of wire. Continue wiring as instructed, attaching necklaces when needed. After about three or four segments of beads, I brought the wire tail back to the top link to secure the beads to the top.
Once you're done wiring the whole thing, you can take it outside and touch up the spray paint in any area that got rubbed off. (I ran out of spray paint before the whole thing was as white as I wanted it to be, but I was too impatient to hold this tutorial any longer, so I went ahead and photographed!)

Add additional embellishments like ribbon, butterflies, bows, etc., according to your own taste and decor.

You can also turn the basket upside-down to use as the base for a chandelier, but if you decide to bead it the same way, you'll need to add a couple of long wires at key points across the basket to keep the beading laying the right way.
Of course, these baskets are great bases for any kind of chandelier you can imagine! You might have a little trouble finding them at your dollar store now (they sell out quickly), but you can get them for about $5 at your local big-box store. I know that's not as great a price as $1, but it's still pretty cheap for a great chandelier base. The dollar store also has wire baskets that will work decently for chandelier bases. Try those and let me know how they work out for you!

Now for a little more $$ you can splurge on some amazing beads and take your chandelier up a notch.
Five Mountain Gems has promo bead strands as low as .69$ a strand and they are GORGEOUS!!


Good luck!


Denise